Drum Brake and Shoes Overhaul
Article by Mark Trotta
The difference in stopping power with newly-overhauled drum brakes is very noticeable, and will make your old car safer and more enjoyable to drive. Proper drum brake restoration requires several speciality tools and an evening or two in the garage.
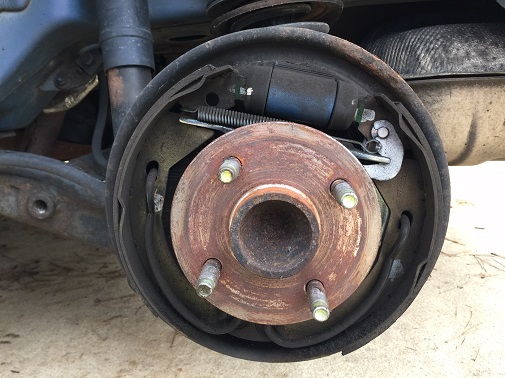
Drum brake systems can be divided into two categories, hydraulic (master cylinder, wheel cylinders, brake lines, brake fluid) and friction. This article covers the friction parts, which include brake drums, shoes, hold-down hardware, and parking brake cables.
Related Articles:
How To Rebuild Wheel Cylinders
How To Make Brake Lines
Drum Brake Tools
Best Brake Fluid For Classic Cars
********************
Brake Drums
There are several types of brake drum construction. The most common is the one-piece cast iron style. There are also composite drums, which use a either a sheet-steel hub with an iron rim cast to it, or a sheet-steel drum with a cast iron surface inside it. Composite-style drums are lighter than cast-iron drums.
Cast Iron vs Aluminum
Many sixties performance cars (Corvette's, GTO's, etc.) offered optional aluminum drums for lighter weight. Some of these were also finned, which helped dissipate heat (and looked cool).
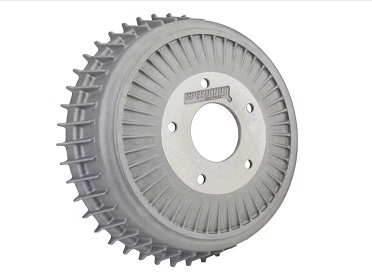
Pictured: Buick-Style Aluminum Finned Drums sold by Speedway.
Aluminum naturally transfers heat better than cast iron, and is also lighter in weight. Many aluminum brake drums are actually bimetallic, manufactured from aluminum and cast iron. The Al-fin brake drum, once the hot set-up, used a special process for casting the aluminum around the iron.
The larger the brake drum, the better it can dissipate heat. Larger drums also reduce brake-pedal effort. Back in the day, early racers and hot-rodders fit as big a drum brake as could fit inside the wheel.
Removing Brake Drums
Before you start banging on the back of your drum with a hammer, you may need a brake drum puller to remove them.
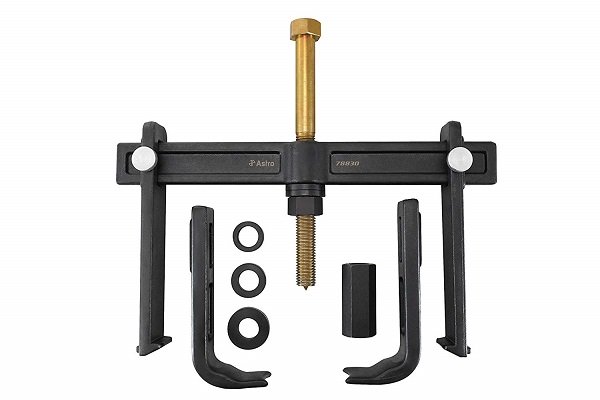
Also, remember to disengage the parking brake while inspecting rear drums, as this will prevent the drum from coming off.
Brake Drum Inspection
After you've removed them from the car, check the insides for grooves and wear. Although they can often be resurfaced, very few machine shops still do this.
Geezer Alert - Back in the day, auto parts stores used to do this.
Replacing Brake Drums
Upon inspection, you may find that the shoes have worn as far as the rivets, scoring the drums and/or leaving them too thin to be machined.
Depending on your year and model, replacement brake drums may be hard to find, and only available only as used, which may or may not be in better shape than the ones you're replacing.
If you need them, they'll be the most expensive part of the overhaul.
Brake Shoes
Work on only one wheel at a time, so if you forget how it came apart, you can use the other side as a guide to put all the pieces back together.
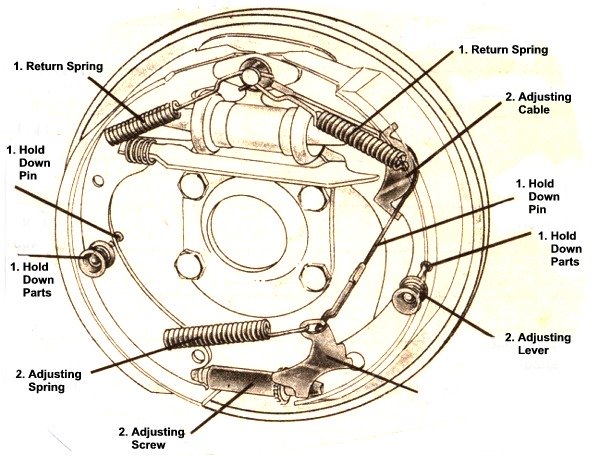
The primary shoe (the one in front) is the shorter one.
Brake shoe friction material varies. There are organic and several qualities of metallic linings.
Friction material, or brake lining, is either bonded (glued) or riveted on the brake shoe. Many performance cars of the sixties offered sintered metallic brake linings for better stopping power.
When buying replacement shoes (usually sold as exchange), make sure all the holes in the new shoes line up with the old ones. If a return spring is placed in an improper hole, dragging or grabbing brakes will result. Keep in mind that shoes may have extra holes to fit applications other than yours.
Before installing the new shoes, consider cleaning and painting the backing plates. A spray can of black engine enamel would work fine. Remember to apply a small amount of all-purpose grease to the friction points on the backing plates to help the shoes move freely.
********************
Adjusting Brake Shoes After Installation
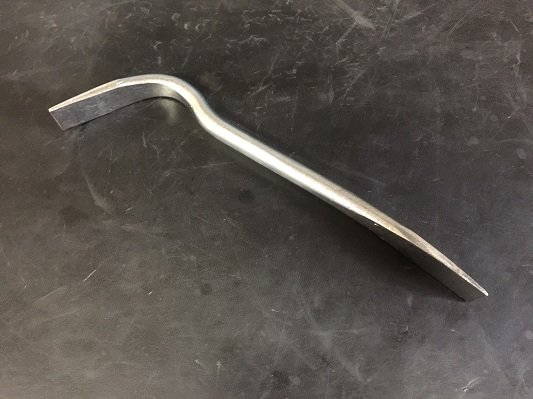
Most drum brake equipped vehicles have a window or slot on the back side of the backing plate. This allows access to the self-adjuster to manually adjust the brakes with a brake spoon.
If there is no access slot, the wheel and drum must be removed to adjust the shoes.
Some mechanics like to 'bed in' new brake shoes. This is done by a series of short, hard stops from about 30 mph, letting the brakes cool down (about 15 minutes), and then repeat the process once more.
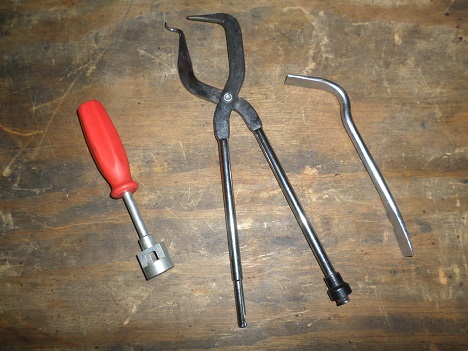
Read: Drum Brake Tools
********************
Notes and Misc
Work on one side of the car at a time, using the other side as a reference.
Before re-installing brakes, clean and spray the backing plates with black engine paint.
Never replace just one side brake shoes - you'll get a sharp pull or worse.
Having a service manual for your year and model is always a good idea.
Before re-installing wheels, a dot of Anti-Seize lubricant on wheel studs insures that wheels will come off easily in the future.
Apply a small amount of all-purpose grease to the friction points on the backing plates.
The parking brake is applied by a mechanical linkage, usually a cable or cables. The rubbing points on these should be lubricated as well.
Safety Concerns
Most older brake shoes were made with asbestos, whose debris is dangerous to your health. Wear a dust mask when removing old drums and shoes. Don't use compressed air to clean off brakes. Use brake parts cleaner and a wire brush.
With new parts and quality shoes, drum brakes work better than most people believe. The difference in stopping power with a newly-overhauled brake system is very noticeable, making your old car safer and more enjoyable to drive.
********************
FUN FACT: Many old-school drag cars still run four-wheel drums because they're lighter than discs. They also have less drag - if you back off the adjusters all the way, you'll have less rolling resistance. This is not recommended for street-driven cars!
********************
Related Articles: